The embroidery group met at 6 pm and started their introduction to Silk Ribbon embroidery. Vevia went over what all was in their kits....

Part 2 directions and some suggested stitches for the chicken pincushions can be found by clicking here
and here

Click on the picture to see these examples larger. A good way to try out different types of flowers is with strips of muslin. Vevia had these examples ready for the ladies to experiment with.

Jeanette K

Jeanette D

Carol and others all gave it a try.

The next few pictures are blow ups of what they will be doing on their chickens. They were all encouraged to get on the net and find various flower and leaf types to put on their chicken.

Here is just one site that is available: click for silk ribbon on you tube


Virginia and granddaughter shared their adventure.
*************************
As members came in, they had two tables of free possibilities.

Thank you to everyone that shares with the group.

Whether it's a magazine, book, patterns that you will never do, or .......
it is much appreciated by all.
**************************
Carol called the meeting together and showed her to beautiful. Sorry, we tried to get a picture of the Christening gown and the new little lady that is wearing it - but they did not come through. Sure that if you visit the store - Carol might have it there to proudly show off.

Members were really blessed to have two of our own give the program this month.

Carol B took on English Paper Piecing and Ginny B. covered foundation and paper piecing.

Carol had a gorgeous Grandmothers Flower Garden set up for everyone to see and the machinery to show us a You-Tube

Unfortunately - there was some technical difficulty
Every one was encouraged to go to the web and look up paper piecing tutorials.

Carol used large pieces of paper to show us hexagon patterns and "pretend" fabrics. The hexagon is the shape that we are most familiar with. Templates are measured by one side, going from 1/4" to 6".

Carol does a lot of her EPP when she is riding. She takes strips and cuts them, or uses squares.

She showed us the technique of taking the paper template and "wrapping" the fabric around it.
There are many ways to "attach" the fabric, from basting through the paper template, to basting in the fabric at the corners, to gluing the fabric down.

Try several ways and see which you like the best.

Carol showed us how to join the pieces...

and then showed us examples of what you can come up with.

Loved this "depth" version. She wanted some flowers to look like they were laying on others.

And this snowflake was wonderful. Carol told on herself - and encouraged us to
READ THE DIRECTIONS!
You may not always follow them, but at least you will have an idea of the next steps.

The star above was made from diamond templates

Quilting Arts newest magazine out tells us that we CAN take it with us.

There are many books out there to help you along, Carol brought in this one as an example.

When she and husband stopped in Paducah this year, she went to the Paper Piecing store and picked up a catalog. https://www.paperpieces.com/ You can go here to get an example of what is on the market.

Carol's sister made her the perfect carrying case for her EPP projects.

All those pockets.

Ginny had one of her animal quilts on display to show us how itsy bitsy you can go when you paper piece or foundation piece. What's the difference? Paper piecing you use paper and later pull it out. Foundation piecing is the same technique; however, you use some type of foundation (light weight interfacing, muslin, etc.) and leave it in.

Ginny has made this Ark Quilt for little ones and uses the other animals in the book to design her own quilts.

With paper piecing you start with a pattern. Using the lines to sew on and place the fabric on the back.
Ginny encouraged everyone to FOLLOW THE NUMBERS! Yep, it's as easy as 1 - 2 -3.
Here are a few examples of what other members brought in to share.

The little pincushion was from an English Paper Piecing workshop that Jan J. had given back in 2008 (or there abouts) Then a tea cozy that Vevia made using a Palestrina stitch to join the hexagons.

Vevia brought in a foundation paper piecing wall hanging - "Motion" from Patricia Adams.

And a foundation PP using "Do-Sew" as the foundation.

Cindy K. had sent in her strip blocks showing using pages from telephone books as your paper.
Ginny covered shortening your stitch length to make it easier to pull out the paper.

Back in 2004 when the guild started, Marilyn had made her name badge using paper piecing.

Deb M. had taken a class about hexagons.

Carol used paper piecing to create this Wave look.

Jan J thinks this is a Mother's Flower Garden quilt of her great grandmothers. No that is not a hole, it is in great shape - just has the sun shining on the back.

Jan knew she could make one also - she worked hers up as applique on a whole cloth. Look at all those different layouts for the hexagon.

Shirley H brought in a block she did with paper piecing.
The fun is when you come out with very crisp points.

Karen U put this quilt together with paper piecing. Wow, look at those points.
After the program - Show 'n Tell gave us even more to stimulate our creative juices.

Teresa E gave the kit to a male family member - course the first thing out of his mouth was - You don't expect me to make this do you? hahahahaha Teresa put it together for him later. Great job Teresa.

Jenell H had bought some gorgeous expensive gradiant fabric and did not know what she would do with it. She got a pattern from Iowana's things and look what she came up with.

Jenell has been working on other things also - table mats, table runners and baby blankets. Thank you Jenell for bringing in the pictures for us to see.

Deb M finished one of Iowana's UFO's.

and is working on a quilt for a friend that has breast cancer. She will be finishing it with a flannel backing that also has the pink ribbons on it.

Karen has a daughter graduating college and this magnificent quilt will be presented to the grad. Hand quilted too!

Karen tried her hand at folded flowers - she did awesome. So many tiny stitches, flowes and leaves. Great quilt - had to be seen up close to really see the craftmanship.
******************
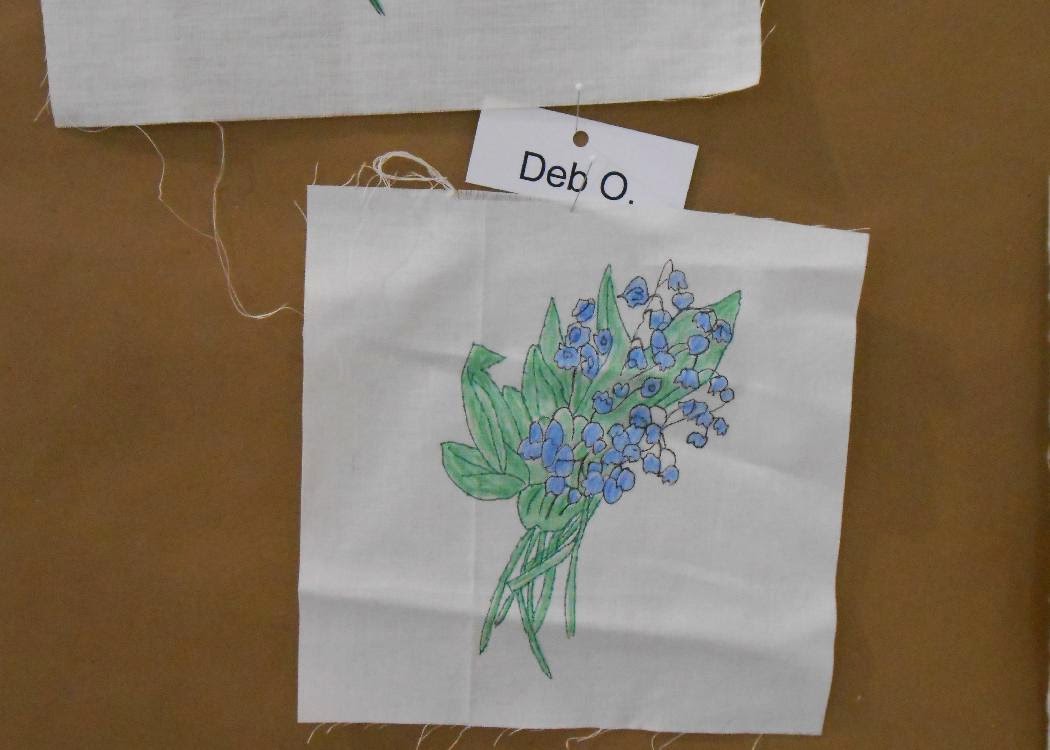
BOM for the month was the Rose.


Names are on each of the May blocks brought in to share.
You will see that there is more than just white when you are talking about Lillies of the Valley.
Some had a little difficulty and seeing what others did, sure helps everyone out.
Thank you ladies for sharing.


Susie may try some paint to bring out her flowers more.


Jeanette D. decided to satin stitch embroider her lillies to make them stand out

Love it when we get to see several of one person's work at one time.

Marilyn even has started setting her blocks.
Thank you ladies for joining in on this years BOM and for sharing your work.
Remember the sew day - June 6th - and remember your UFO's for next month.
Till then.....................

No comments:
Post a Comment